


Ah, the first sign of spring –– daffodils! A refreshing sight after a cold and dreary winter, their cheery yellow blossoms bring the promise that warmer weather and sunshine are near.
Our new Daffodil Story was created with spring celebrations in mind. Elevate Easter tables, spring luncheons, baby showers and more with delicate daffodils and grape hyacinths.
We’ve put together some styling tips to help inspire your spring celebrations with the Daffodil Story, including how to make paper daffodils with crepe paper. It’s a simple craft that’s fun to make and looks great as decor for special events –– especially if you can’t get your hands on freshly bloomed daffodils.

MATERIALS NEEDED:
- Floral wire for stems (the thicker the better)
- Crepe paper in both green & yellow varieties
- Floral tape
- Craft glue
- Faux flower stamens (in white, cream or yellow)
- Light brown or gold tissue paper

GETTING STARTED:
CUT floral wire to desired stem length.
SECURE a cluster of flower stamens on one end of your floral wire.
WRAP your wire from top to bottom in floral tape. If you want thicker stems, you can first wrap the wire in strips of tissue paper, then wrap over the top with floral tape.
TIP: the floral tape will easily stick to itself and become stickier as it stretches.

MEASURE and cut a rectangle piece of crepe to become the trumpet part of the daffodil. Gently stretching the top part of your rectangle will help to create a flared, frilly edge.
JOIN the short sides together and glue. Put your crepe cylinder over the top of your completed stem and pinch the bottom part to create the trumpet.
SECURE to stem with glue.
CUT six identical crepe pieces and gently mold them into the desired petal shape.

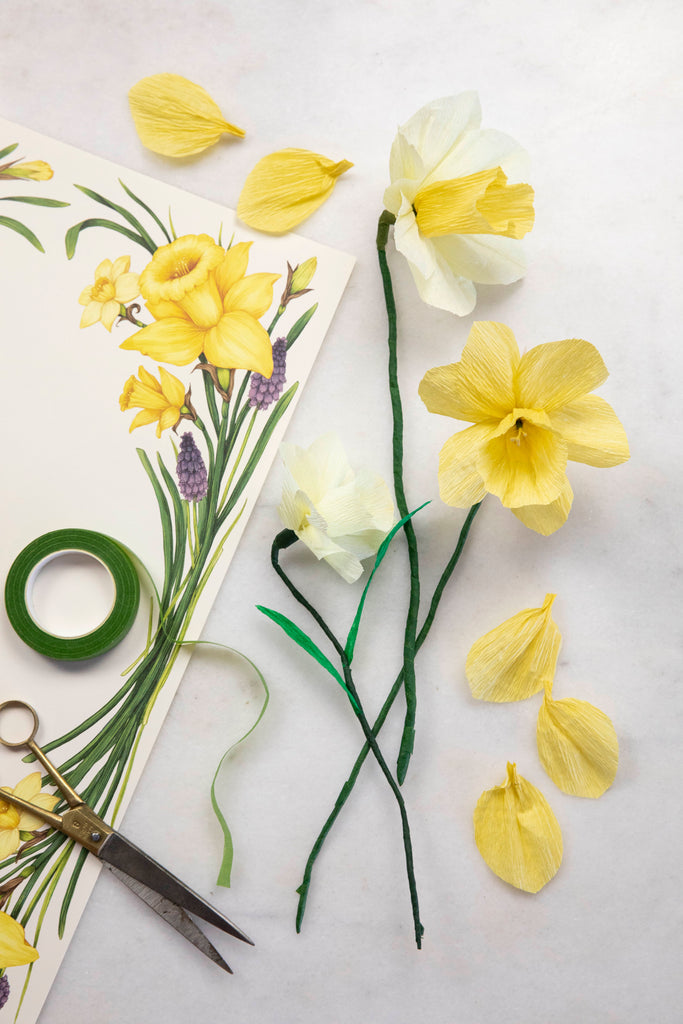

GLUE your six crepe petals to the trumpet shape you made.
WRAP the bottom of your daffodil with floral tape to secure it firmly to the stem.
OPTIONAL: Add small triangular pieces of delicate tissue paper towards the base of the flower to create the “spathe”.
ENJOY your beautiful spring blooms!

Print the entire step-by-step guide here!
