


Fresh flowers are one of the things we love most about spring. After short winter days with long stretches of grey, each new bloom we see feels like a burst of sunshine. We love putting fresh flowers on a table, but nothing adds a sense of magic and festivity quite like wearing them! We’re going to show you how to make a flower crown for any occasion, as well as some tips to make your creations last.

PICKING YOUR FLOWERS
When making a flower crown, the types of flowers used will contribute to the longevity of your crown-- certain flowers will stay looking their best longer than others, and even have the potential to dry beautifully, giving your creation an even longer life. For a forever flower crown, you can start with dried flowers or even go faux, using either silk or paper florals to get the same dreamy results.
STEP 1: GO GREEN
No matter what kind of crown you’re making, greenery will serve as a great base and help fill in any gaps between bigger blooms. We love going seasonal with our greens: ferns, lavender, and lambs ear serve as a great foundation in warmer months, while cedar and cypress are wonderful for cool-weather crowns. Eucalyptus and mint are also available year round and make lovely (and great smelling!) foundations. We’re particularly fond of seeded eucalyptus, which has tiny bright green seed pods in addition to their blue-green leaves.
STEP 2: FILLER FLOWERS
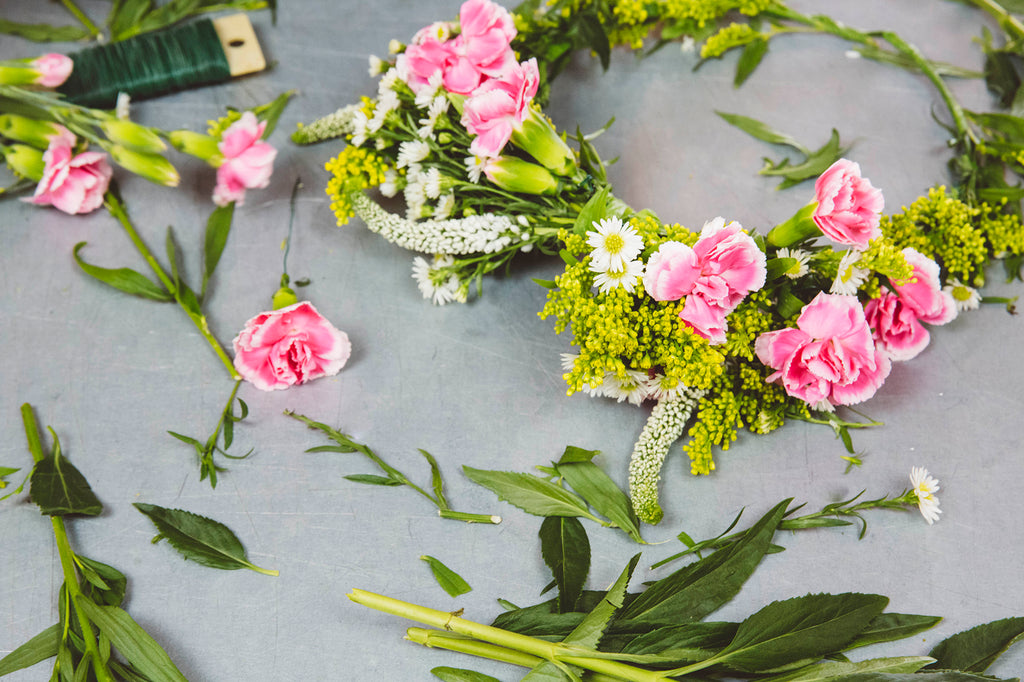
Don’t be fooled by the name: filler flowers are just as important as any! These small to medium sized blooms will make up the bulk of your crown. We love feverfew (they look like miniature daisies!), baby's breath, statice, and heather for their tiny clusters of color, while snapdragons, bells of Ireland, and delphinium are great mid sized blooms with lots of flowers per stem. For a daintier look, you can even make a crown of just greenery and filler flowers-- personalizing a crown to the occasion is one of our favorite parts of this DIY!
STEP 3: MAKE A STATEMENT
For the ultimate wow factor, including a few bigger blooms on your crown is a must! We love peonies, garden roses, and chrysanthemums-- all 3 of these come in a wide swath of colors to fit your occasion. Carnations are easy to come by and last out of water for hours, which makes them another ideal choice for your crown.
We recommend going to your local farmers market to find the most in season blooms for your crown –– these flowers will likely last longer since they’ll have been freshly cut. We love being inspired by what’s in bloom, and your florist should be able to help you pick coordinating greenery and filler flowers (or grab a premade bouquet for even more ease). If you’re a Nashville local, Bloomchick, Amelia’s, and Import Flowers are some of our favorite places to shop blooms.

Now that you’ve got your greenery and flowers, you just need a few more items to start building your crown:
FLOWERS! Thick gauge wire (12 gauge) or grapevine, wire cutters, thin craft or floral wire, scissors or floral snips (if using real flowers), florist tape

Start by measuring the thick wire around your head, positioning it where you’d like your crown to sit. Cut your wire with 1” - 2” of extra length. Fold both ends of the wire into loops, then slide one through the other to hook together and create your crown shape. Test your crown on your head and adjust for a desired fit-- you can make it bigger or smaller by moving your loops or twisting the wire.

Once you’re satisfied with your fit, wrap the joint tightly with floral tape to secure the ends.

Trim your flowers so all stems are the same length, about 3”. Be sure to remove any excess foliage from the stems of your larger blooms to make it easier to add them to your crown. Leave your greenery a bit longer for now, but trim off any extra thick or less flexible stems.

Tip: for larger blooms, cut a piece of thin floral wire and carefully push it through your flower from the back-- it should come out in the center. Gently fold the end of the wire to form a hook, and pull it down into the center of your bloom to secure. This wire will act as reinforcement for the stem, allowing your flower head to stand up proud!

Layer long pieces of greenery along your crown base-- we recommend beginning at the back of your crown near the hooks and working your way forward. Secure pieces of greenery with craft wire, overlapping so that the leaves of one piece cover the stem of your next.

Facing your greenery to the front will help your crown look more full.

Add filler flowers to your base, once again starting at the back and working forward. We often will test a design for a crown by positioning flowers beside the base on our work surface, changing the order until we get the perfect layout and color balance. Once your blooms are in position, wrap with floral tape on an angle, overlapping slightly, starting at the stem and working toward the head of your flower. Floral tape activates and becomes more sticky as you stretch it, so be sure to pull it taut as you wrap.

For a more full crown, you can create mini bouquets of filler flowers by securing bunches of blooms with floral tape, then attaching the bouquets to the crown rather than individual blooms.

Keep adding flowers until your crown is as full as you’d like! To add bigger flowers, carefully wrap the reinforcement wire you added around your crown base after getting it into position-- wrapping this and the stem in floral tape will help it stay in place.

We like peppering larger blooms throughout our designs, but placing a few big flowers just in the front or back of your crown makes a great statement!

To finish your crown and hide the hooks, turn two pieces of greenery in opposite directions and wire together.

Attach this piece over the joint at the back of your crown, covering the seam completely.
If you’re making a bunch of crowns, we recommend storing them in the fridge in gallon plastic bags until party time. After your event, hang your crown upside down in a cool, dry spot to help the flowers air dry into position for future use.

We hope you enjoyed this DIY and we can’t wait to see what you make! Be sure to share your creations with #HESTERANDCOOK. Need a printable cheat sheet? Grab our quick DIY guide here.
